
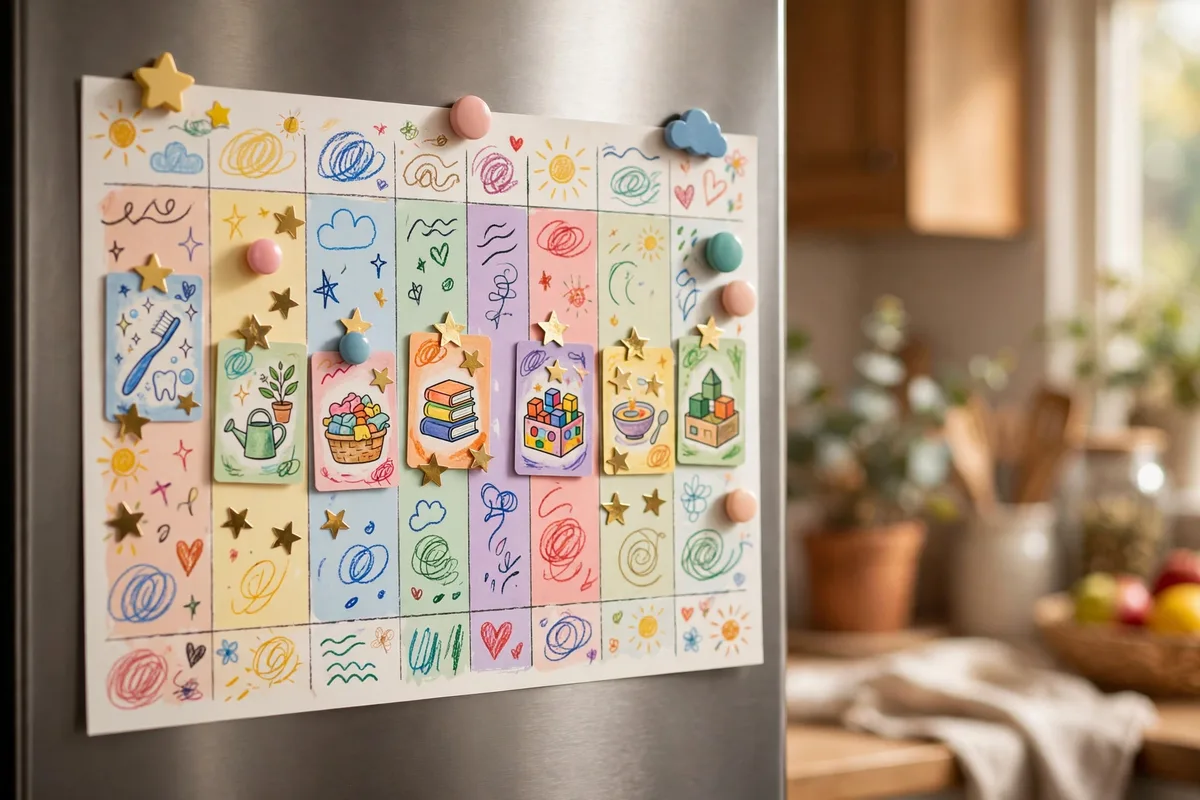
A child-friendly chore chart is a simple, visible chart that lists a few age-appropriate chores your child can understand and check off on their own. The most important ingredient is not the chart itself but how you build it: choose 3 to 5 tasks that match your child’s age and ability, design the chart together with your child, put it where they can see and reach it, and review it weekly. When chores are visual, specific, and tied to a small reward, kids are far more likely to follow through.
What makes a chore chart “child-friendly”?
Most chore charts fail for the same reasons: too many tasks, vague instructions, and a chart that lives in a drawer instead of on the wall. Before you start building, keep these principles in mind:

- Short, not ambitious. Start with 3 to 5 chores. A short list your child finishes beats a long one they ignore.
- Specific, not vague. “Clean your room” is overwhelming. “Put toys in the bin and make the bed” is doable.
- Visual and reachable. The chart should hang at your child’s eye level, somewhere they pass daily — the fridge, a bedroom door, or a hallway wall.
- Kid-owned. Charts built with children get used. Charts handed down to children get ignored.
- Positive. The chart tracks effort and completion, not punishment. Missed days are restarted, not penalized.
Step-by-step: make your chore chart
Step 1: Talk about why everyone helps at home
Start with a short family conversation, not a lecture. Explain that a household runs better when everyone contributes, and that chores teach responsibility and teamwork. The American Academy of Pediatrics notes that age-appropriate chores build responsibility, belonging, and self-esteem. Ask your child which chores they’d like to learn.
Step 2: Choose the chart format
Pick a format that fits your child’s age. Any of these work well:
| Format | Best for | How it works |
|---|---|---|
| Paper grid (weekly) | Ages 6 and up | One column per day, one row per chore; check boxes with a pen or stickers |
| Picture chart with Velcro or magnets | Ages 3–5 (or non-readers) | Illustrated task cards move from “To do” to “Done” |
| Clothespin board | All ages | Chore names written on clothespins clipped under “To do” / “Done” |
| Dry-erase board or laminated sheet | Busy families | Wipe clean each week and reuse |
| Digital checklist app | Older kids and teens | Shared checklist on a tablet or phone they can tick off themselves |
There is no best format — the best one is the one your child will actually look at. If you are not sure which chores fit which age, our guide to age-appropriate household tasks lists ideas from toddlers to teens.
Step 3: Pick 3 to 5 age-appropriate chores
Assign chores by ability, not age alone. Use this table as a starting point, then adjust for your child:
| Age | Good starter chores |
|---|---|
| 3–4 | Put toys in a bin, wipe low tables with a damp cloth, carry light laundry items, help match socks |
| 5–7 | Make the bed, clear their plate, set the table, sort laundry by color, water houseplants |
| 8–10 | Unload the dishwasher, vacuum one room, take out a small trash bag, help pack school lunches |
| 11–14 | Do their own laundry, clean the bathroom sink, help cook a simple meal, walk the dog |
Keep at least one chore your child can succeed at on day one. Early wins build momentum.
Step 4: Build the chart together
Sit down with your child and make the chart as a team. Let them pick the colors, write or draw the chore names, and decorate it. For non-readers, draw simple pictures or print small photos of each task. Kids use and protect things they helped make.
Step 5: Put it where they can see and reach it
Hang the chart at your child’s eye level in a central spot: the side of the fridge, inside a bedroom door, or near the entryway. If they cannot see it and reach it, they will not check it without being reminded.
Step 6: Set a simple marking system
Decide how completed chores get recorded. Pick one and stay with it:
- Stickers or stamps — satisfying for younger kids
- Checkmarks with a colored marker — simple and reusable on laminated charts
- Moving a card, magnet, or clothespin from “To do” to “Done” — good for tactile learners
- Tapping a checkbox — for digital charts
If the chart is reusable, reset it together at the start of each week.
Step 7: Decide on a reward or incentive
Tie the chart to something your child cares about, and put the goal on the chart itself so it stays concrete. Options that work well:
- A weekly treat: extra screen time, a trip to the park, a movie night
- A points system that adds up to a bigger reward, like a new book or an outing
- Allowance tied to completed chores — if you go this route, see our guide to teaching children basic money habits
Keep rewards consistent and achievable. A chart that never pays out stops working fast.
Step 8: Review and adjust weekly
Once a week — Sunday evening works well — sit together for five minutes. Count the checks, celebrate what went well, and adjust. Swap out chores that are too easy or too hard, and rotate in a new one every few weeks. Update the chart as your child grows.
Tips to keep the chart working past week one
The first week is usually fun because of the novelty. Here is how to keep momentum going when that fades:
- Attach chores to an existing routine. “After breakfast, check the chart” works better than “sometime today.”
- Model the behavior. If everyone has visible responsibilities, the chart feels like teamwork, not punishment.
- Praise effort specifically. “You remembered to do your chores before I asked” beats a generic “good job.”
- Use the chart to prevent sibling fights. Written-down jobs mean less arguing about whose turn it is. If sibling friction is a bigger issue, our positive sibling routines guide can help.
- Expect and forgive missed days. A missed day is not failure. Restart the next day without a lecture.
Troubleshooting: when the chart stops working
| Problem | Fix |
|---|---|
| Child ignores the chart | Move it to a more visible spot; reduce to 2–3 chores; check if tasks are too hard |
| Child complains chores are unfair | Revisit the chart together and let them swap one chore for another they prefer |
| You have to nag anyway | Attach chart time to an existing routine (after dinner, before play) and let the chart be the reminder |
| Siblings fight over chores | Give each child their own chart and rotate the unpopular jobs weekly |
| The reward stopped motivating | Change the reward — ask your child what they would like to work toward now |
FAQ
Should I pay my child for doing chores?
Routine family contributions — clearing the table, tidying shared spaces — work better as unpaid expectations, since every family member helps. Extra jobs above the routine can be paid as an opportunity to earn. Whatever you choose, state it on the chart so expectations are clear.

What if my child is too young to read?
Use pictures instead of words. Draw a simple icon for each chore or take a photo of your child doing the task as the chart label. Many families find picture charts work well through age 5.
How long until chores become a habit?
Most families find the chart needs active upkeep — the weekly review — for at least a month before chores start happening with less prompting. Consistency from parents matters as much as the chart design.
Conclusion
A child-friendly chore chart is a short, visible, specific list built with your child and reviewed weekly. Start small, make it visual, put it where they will see it, and celebrate effort over perfection. You will spend a little time setting it up, and save a lot of time reminding.


Pingback: Chores by Age: The Right Household Tasks for Every Stage